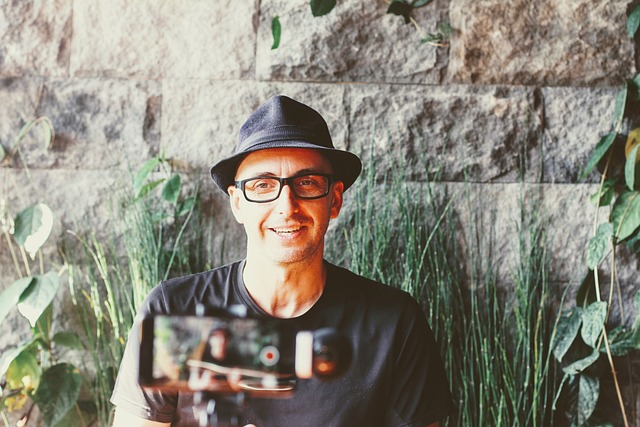
Connecting Through Video
In today's digital era, online learning has taken center stage and the importance of creating appealing content for your courses cannot be overstated. Video, in particular, has emerged as the "gold standard" for online course content due to its multi-sensory nature, allowing students to both see and hear the material, making it more captivating and memorable. If you're hesitant about recording video content for your online course, fear not! You don't need expensive equipment or extensive on-camera experience to produce high-quality videos. In fact, you can do it all from the comfort of your home and even enjoy the process. By following these four steps, you'll be on your way to creating professional-looking videos that your online students will love.
Step #1: Gather Your Gear
When it comes to your video recording setup, having the right equipment can make a significant difference. You don't need a professional studio or pricey gear to create effective online course videos. In fact, research has shown that students often prefer videos filmed in informal settings over big-budget productions.
Microphones: For the clearest audio, it is recommended to use an external microphone rather than the one built into your computer. If you have an iPhone and own a pair of AirPods, you're all set for recording anywhere. If you’d rather be at a desk, or in a fixed position with your laptop or desktop computer, order a condenser microphone from Amazon, or a lavalier mic that you can plug into your phone and walk around with. While you can use a headset, it’s definitely more enjoyable to watch someone sans headset.
Cameras: Many smartphones have high-quality cameras, often capable of recording in 1080p or even 4K. Whether you have an iPhone or Android, you can find guides (like this one) for recording high-quality videos with it. If you're using a computer, consider getting an external webcam for higher resolution. DSLR cameras can also be used if you have one available. And be sure to have a tripod to stabilize your camera and prevent shaky footage–it’s the worst.
Lighting: Lighting plays a crucial role in video quality. You have the option of tabletop lighting for close-up shots, or studio lighting for more elaborate setups. Tabletop lighting is what most course creators use for “talking head” videos. You face the camera, and the light faces you. Ring lights work great for this and eliminate shadows by placing light all around your camera. A well-lit environment ensures your videos look professional and engaging.
Step #2: Set Up Your Space
Creating a suitable recording space is critical to the success of your online course videos. Think of it as setting up a classroom environment that enhances your students' learning experience. Consider the following:
- Choose a setting that matches your course topic, such as filming a fitness class in a home gym or a cooking course in your kitchen.
- Pay attention to your background; it should be visually appealing and relevant to your content.
- Include items in the frame that reinforce your topic, such as art supplies for an art course.
Remember that your recording setup doesn't need to be perfect. Research indicates that video content quality ranks lower in importance compared to factors like perceived learning, delivery style, and video length.
Step #3: Plan Out Your Video Content
Before hitting the record button, plan your video content carefully to keep from overshooting footage, tacking on hours of extra editing time, or forgetting to cover an important part of your lesson.
Here's what you can do:
- Outline your content to establish a clear structure for each video that has a beginning, middle, and end.
- Decide whether to write a full script or use bullet points. A script can help you maintain focus and confidence on camera.
- Keep your tone conversational and use simple language. Avoid jargon, as it can deter viewers from complex subjects.
- Break down your content into shorter, more digestible videos, ideally under six minutes each. This helps maintain viewer engagement.
A large-scale study from researchers at MIT found that videos shorter than six minutes hold viewers’ attention longer, which means more students finish each lesson. Shorter videos make learning more manageable. When you divide your content into these digestible segments, it becomes easier for your students to tackle. Think of it like enjoying your favorite meal one bite at a time instead of trying to devour the whole thing at once.
And above all, viewers appreciate authenticity, so be yourself and communicate as if you're explaining the topic to a friend.
Step #4: Record Your Online Course Videos
Now, it's time to step in front of the camera and start recording. It's entirely normal to feel some stage fright, even for experienced presenters. First and foremost, when you find yourself struggling to overcome self-doubt, remember that your audience doesn’t expect you to be perfect. Here are some tips to help you feel more confident:
- Practice your content beforehand, either in front of a mirror or by recording yourself. Pay attention to body language and timing.
- Be reasonable in evaluating your practice recordings, focusing on improvements.
- Test your audio and video equipment before recording to avoid technical issues.
- Consider adding screen recordings if your course involves demonstrations, such as coding or software usage.
Once you've recorded your videos, you can use tools like SCC’s license to ScreenPal (formerly Screencast-O-Matic) to add high-quality screen recordings, as well as easy editing. Finally, don't forget to upload your videos to YouTube using your work email account and use SCC's license to cielo24 to get them closed captioned.
Creating professional online course videos at home is achievable and you can start right away. Embrace the opportunity to connect with your online students through video, and you'll find that your students feel like they know you better. Don’t worry about perfection, just start sharing your expertise through the power of video!

Comments
Post a Comment